How to manage s3 upload with evaporate
Integrate AWS S3 with the awesome Evaporate npm package in React
Hi me from the future ! This is an article for you !
I’m trying to help you to never forget something you struggle enough on it : Uploading some files from the browser to a S3 Bucket using ReactJs and Evaporate
First step: S3 Configuration
You have to add CORS configuration to your s3Bucket. To do this, follow this AWS documentation
So you should :
- Create a s3 bucket

- Add the following CORS configuration to enable multiple part upload provided by evporate :
<CORSConfiguration xmlns="http://s3.amazonaws.com/doc/2006-03-01/">
  <CORSRule>
      <AllowedOrigin>https://*.yourdomain.com</AllowedOrigin> <!-- * to allow localhost -->
      <AllowedOrigin>http://*.yourdomain.com</AllowedOrigin> <!-- * to allow localhost -->
      <AllowedMethod>PUT</AllowedMethod> <!-- Allow modification of an object -->
      <AllowedMethod>POST</AllowedMethod> <!-- Allow creation of an object -->
      <AllowedMethod>DELETE</AllowedMethod> <!-- Allow deletion of an object -->
      <ExposeHeader>ETag</ExposeHeader> <!-- DAMN GOD, do not forget this line !!! it's enable multipart upload -->
      <AllowedHeader>*</AllowedHeader>
  </CORSRule>
</CORSConfiguration>
Second step: IAM Configuration
You have to create IAM users and give them only the permissions they need ie Create an object on your s3 bucket allowed by credentials signature
So you should :
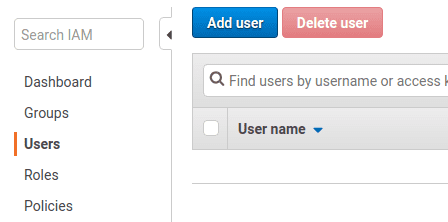
- Create IAM user

- Add the created user to a group
- Attach the following policy to the group (please use the visual editor to create a new one):
{
  "Version": "2012-10-17",
  "Statement": [
    {
      "Effect": "Allow",
      "Action": "s3:PutObject",
      "Resource": "arn:aws:s3:::zazapeta/" // THE HOLY GOD DAMN s3 BUCKET NAME !
    }
  ]
}- Finish the user creation
- Please, SAVE IMMEDIATLY the credentials. This is your uniq chance to get the secret key. So download the csv and store it like your biggest secret ever (DO NOT COMMIT IT - NEVER - PLEASE DO NOT DO THAT) ! Saving the credentials in a .env file is a good practice
Well done. Just to resume what you did :
- Created a bucket s3 with CORS configured
- Created a policy to allow the PutObject on the created bucket
- Created a group with attached created policy
- Created a IAM user and added it to the created group
- Saved the user’s credentials (awsAccessKey - awsSecretKey) in a .env file that will never be commited
Third step : The server
If you forgot how to intall express, or what is a route… DAMN, kill yourself !
If not, just read, and adapt the example to your new work env. The example has been adapted and simplified from Evaporate example directory
#!/usr/bin/env node

// To run:
//  - set environment variables (AWS_SECRET, AWS_SERVICE, AWS_REGION)
//  - $ npm install express body-parser

const express = require("express");
const bodyParser = require("body-parser");
const crypto = require("crypto");

// -------- Crypto helpers ----------
function hmac(key, value) {
  return crypto
    .createHmac("sha256", key)
    .update(value)
    .digest();
}

function hexhmac(key, value) {
  return crypto
    .createHmac("sha256", key)
    .update(value)
    .digest("hex");
}

// ------ Create express server ------
let app = express();

// -------- Configure middleware ------
app.use(function(req, res, next) {
  // Basic request logging middleware
  console.log(req.method + " " + req.originalUrl);
  next();
});

app.use(
  bodyParser.urlencoded({
    extended: true
  })
);

// ------ Configure routes ----------
app.use("/signv4_auth", function(req, res) {
  const timestamp = req.query.datetime.substr(0, 8);

  const date = hmac("AWS4" + process.env.AWS_SECRET, timestamp);
  const region = hmac(date, process.env.AWS_REGION);
  const service = hmac(region, process.env.AWS_SERVICE);
  const signing = hmac(service, "aws4_request");

  res.send(hexhmac(signing, req.query.to_sign));
});

// ------- Start the server -----------
const port = process.env.PORT || 3000;
const host = process.env.HOST || "127.0.0.1";
app.listen(port, host, function() {
  console.log("Listening on " + host + ":" + port);
  console.log(process.env.AWS_SECRET, process.env.AWS_REGION, process.env.AWS_SERVICE);
});
Fourth step : The client (React + Evaporate)
Please, if you forgot how to use React … DAMN ! please, KILL yourself … again !
There is an example of what we can do with evaporate and react by using the render props pattern.
// S3Upload.jsx
import React from "react";
import propTypes from "prop-types";
import Evaporate from "evaporate";
import AWS from "aws-sdk";

class S3Upload extends React.Component {
  state = {
    evaporate: null
  };

  componentDidMount() {
    Evaporate.create({
      aws_key: process.env.AWS_ACCESS_KEY, // REQUIRED -- set this to your AWS_ACCESS_KEY
      bucket: process.env.AWS_UPLOAD_BUCKET, // REQUIRED -- set this to your s3 bucket name
      awsRegion: process.env.AWS_REGION, // s3 region
      signerUrl: `${apiEndpoint}/signv4_auth`, // endpoint of your server
      awsSignatureVersion: "4",
      computeContentMd5: true,
      cryptoMd5Method: function(data) {
        return AWS.util.crypto.md5(data, "base64");
      },
      cryptoHexEncodedHash256: function(data) {
        return AWS.util.crypto.sha256(data, "hex");
      }
    }).then(evaporate => this.setState({ evaporate }));
  }
  render() {
    const { render, pending } = this.props;
    const { evaporate } = this.state;
    return evaporate ? render(evaporate) : pending();
  }
}

S3Upload.propTypes = {
  render: propTypes.func.isRequired,
  pending: propTypes.func.isRequired
};

export default S3Upload;
Usage of S3Upload.jsx :
import React from "react";

const S3InputFile = () => (
  <S3Upload
    render={evaporate => <InputFile onUpload={file => evaporate.add(file)} />}
    pending={() => <div>Loading....</div>}
  />
);

export default S3InputFile;
Il faut rendre à César ce qui appartient à César - So : Do not forget that implementation is inspired by the work done at wild code school when you was the ReactJs instructor :